My online portfolio: Malotke Designs.

Tuesday, February 24, 2015

Mandatory Journaling the LCF Way

During orientation week every student in the study abroad section received a black journal. The are plain sheets with a little pocket on the back cover and they say "UAL: university of the arts/ london/ london college/ of fashion" on the front. It's small and compact. It doesn't fit in my purse but that just allows me to carry a bigger bag (full of things I don't need of course). We are required to document our time here as well as our main three required classes: British Cultural Studies, Fashion History Arts & Artifacts, and Theoretical Contemporary Fashion Studies. How you go about keeping your journal is up to you, as long as it isn't purely just found images (for example solely pictures of your trips). It basically has to contain notes/sketches/pictures of the three mandatory classes and MORE.

I thought it would be a great idea to share some pages from my journal as a way to illustrate the methods I go about keeping a journal of my time here studying in London.

I'm definitely an avid note taker and love to keep my ticket stubs in my journal. I love color & chaos but I'm a little OCD about the order of my journal, as in it's basically a timeline of my classes & museum trips & outings.

Visited the Chanel store & a Rubens exhibit.

Some of my sketches from the Edward Steichen
exhibit at the Photographer's Gallery.

Some of my notes from the Natural History Museum
and part of my review of a Photography exhibition.

More of my Rubens and His Legacy notes.

My notes from Guy Bourdin: Image Maker exhibit.

Some of my notes from visiting the Courtauld Gallery.

Sunday, February 22, 2015

Corsetry Progress Part 2

Close Up
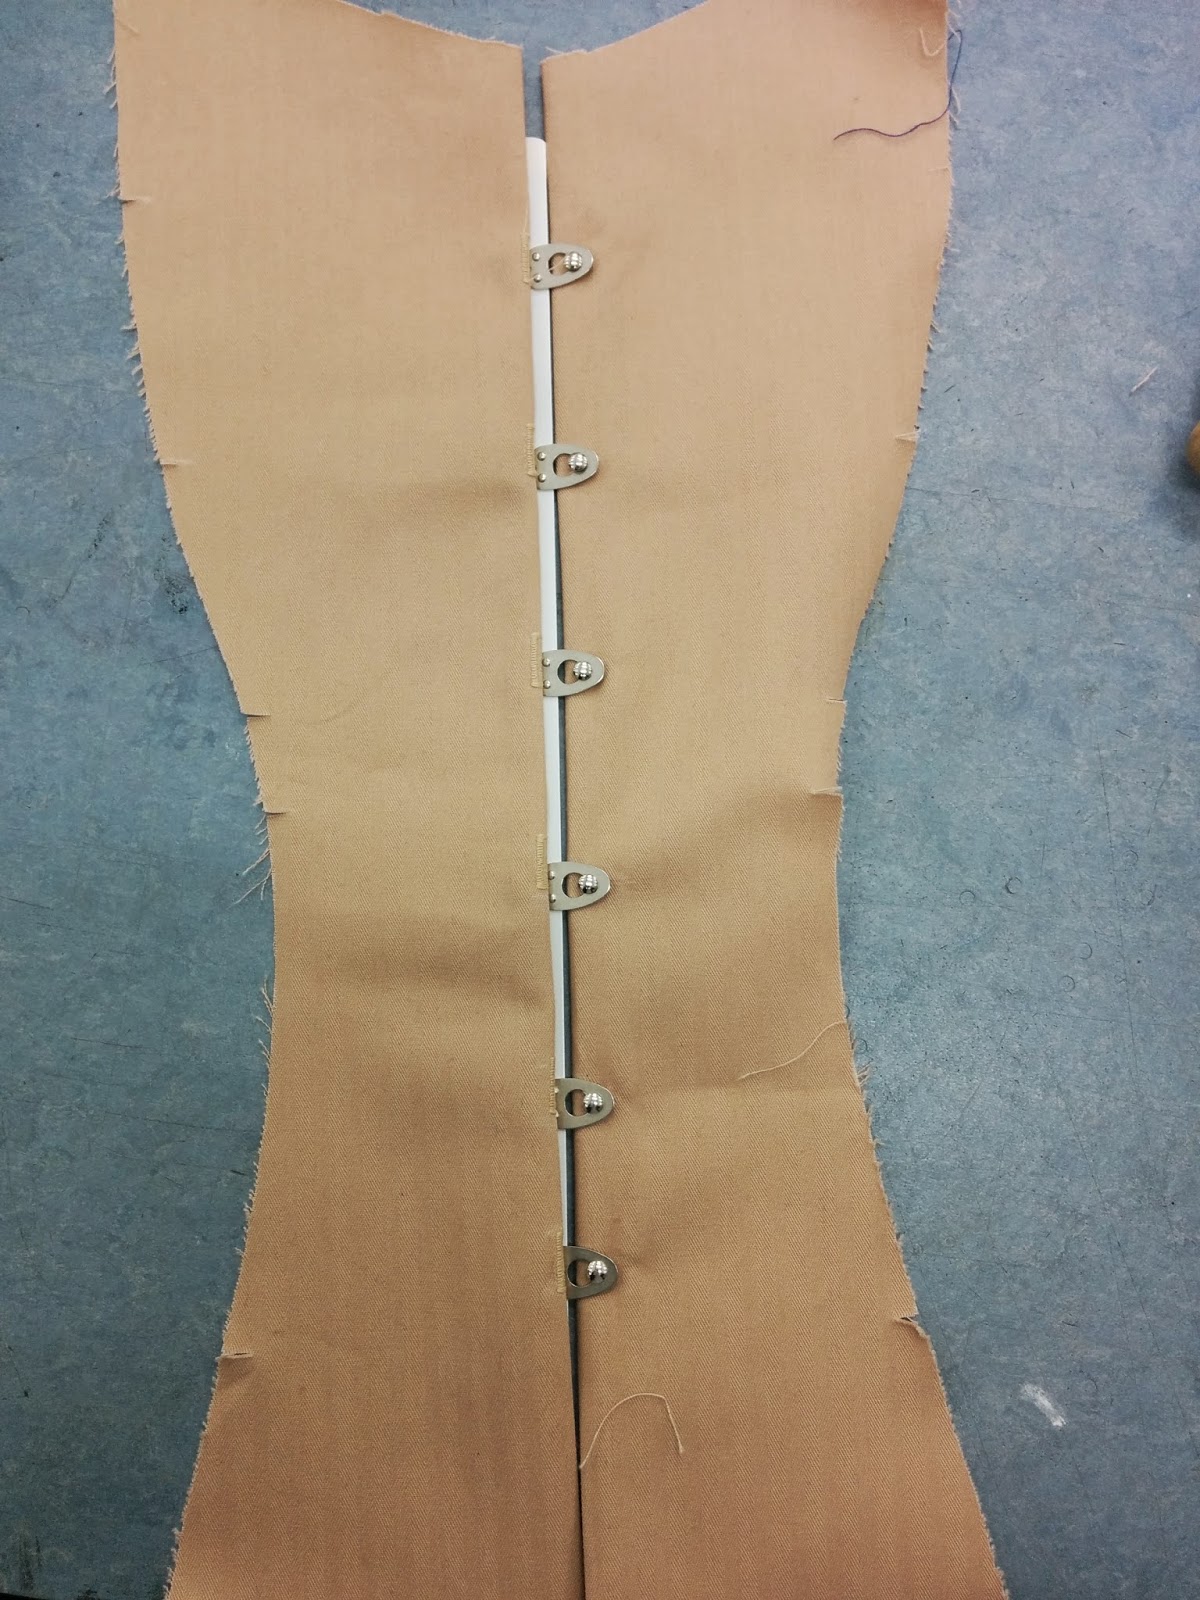
I have made a lot of progress on my corset, despite a few mishaps. In the first left hand photo I am lining up the front hook. I had used an awl to punch hole for the rounded parts to stick through. Then I figures out where the hooks needed to be, marked them, and used the button hole machine to make the holes. 


Next I sewed the nude colored taping to the seam allowance. The picture on the left is a close up, the last right hand picture shows the inside panels I am referring to (the straight lines have the taping).


One of my mistakes was cutting my notches too long, so I had to give up doing running felled seams. Instead I sew my seams, open and iron them, then cut them down. Next I pin the taping over and sew down them down.


The final two pictures shows the front (outside) and back (inside) of the very front of my corset.

I have made more progress since this, but will upload my pictures when I make more progress since I am almost done!


All I have left to do is maybe 2 seams, inserting the boning, eyelets, lacing it, hand stitching the side seams (this is so I can adjust the size for a perfect fit), and then using the taping along the top and bottom of my corset at the very end after deciding if there are any alterations I need to do. That sounds like a lot, but I will make a lot of progress in this week's class and will be finishing it after break for sure!

After I am done with my corset I will be working on creating samples for my sketch book and also doing embroidery samples, such as roses out of ribbon, on to my corset.

Mad Hatter: My first Hat

Materials
After I finished sewing my crown and brim together I finally had a hat!
The next step was to think about trimmings. I knew I wanted to a black and red piece because as of now I plan on using black and red for my senior collection next spring. Since I'm using a sort of traditional form I wanted to go nontraditional with my trimmings choices.

I trekked around London checking out a few different stores before finalizing my plans. I bought a red feather base, 3 sets of red coque feathers (the tiny red ones), and two types of ribbon. I ended up using the pleated looking one over the plain black ribbon. I decided to just keep the plain black elastic, I can always make a few simple skirts using it as the waistband material.

I started off hand stitching the ribbon around my hat. I used plain black thread and made sure it was tight enough but not too tight that it would alter the shape of my crown. I finished by overlapping the two cut sides so it appeared as if it was one connected piece.


Next I stitched my red feather base onto the left side of my hat. I then took a leftover piece of my ribbon and made a sort of flower out of it, stitching this over the bottom of the feather base and the seam of the ribbon. 

Finally I separated my red coque feathers and glued them to my feather base. I used my scissors to gently curl some of them so they weren't all the same height and going the same direction. 

Overall I am very  proud of my first ever hat. Everything but hand stitching was completely new to me and I think that I did a great job at challenging myself for my first hat.

Goofing off in class, wearing my hat!

Saturday, February 21, 2015

Exploring London: A Few Pictures

Goofing off in M&M World
Sample Sale: New Scarf, lamb's wool & angora

Eye Hospital: Look at that clock!
Hanging out in the sun


Loving the architecture 
National Portrait Gallery for class

Saturday, February 7, 2015

First Ever Hat: Short Version of Steps

Chosen my blocks

Blocking the brim.

Blocking the crown.

Getting a fit before sewing on the ribbon.

Getting the crown off the block with a corset bone.

Sewing the crown and brim together.

Corsetry Progress Part 1


Laying out my pieces.

It's been a few weeks but I am making a lot of progress on my first ever corset. We tried on corsets to get a standard size to work with. Then we traced that size on pattern pieces and proceeded to make alterations to achieve a perfect fit for ourselves.

Dying my laces.
Next we cut out the patterns, laid them out on our fabric, and cut the pieces.

Outside of class I dyed my corset laces with Breakfast Tea. They turned out pretty well. Our corsets are kind of a nude color so the laces needed to match, not be stark white.