 |
| Close Up |

 Next I sewed the nude colored taping to the seam allowance. The picture on the left is a close up, the last right hand picture shows the inside panels I am referring to (the straight lines have the taping).
One of my mistakes was cutting my notches too long, so I had to give up doing running felled seams. Instead I sew my seams, open and iron them, then cut them down. Next I pin the taping over and sew down them down.

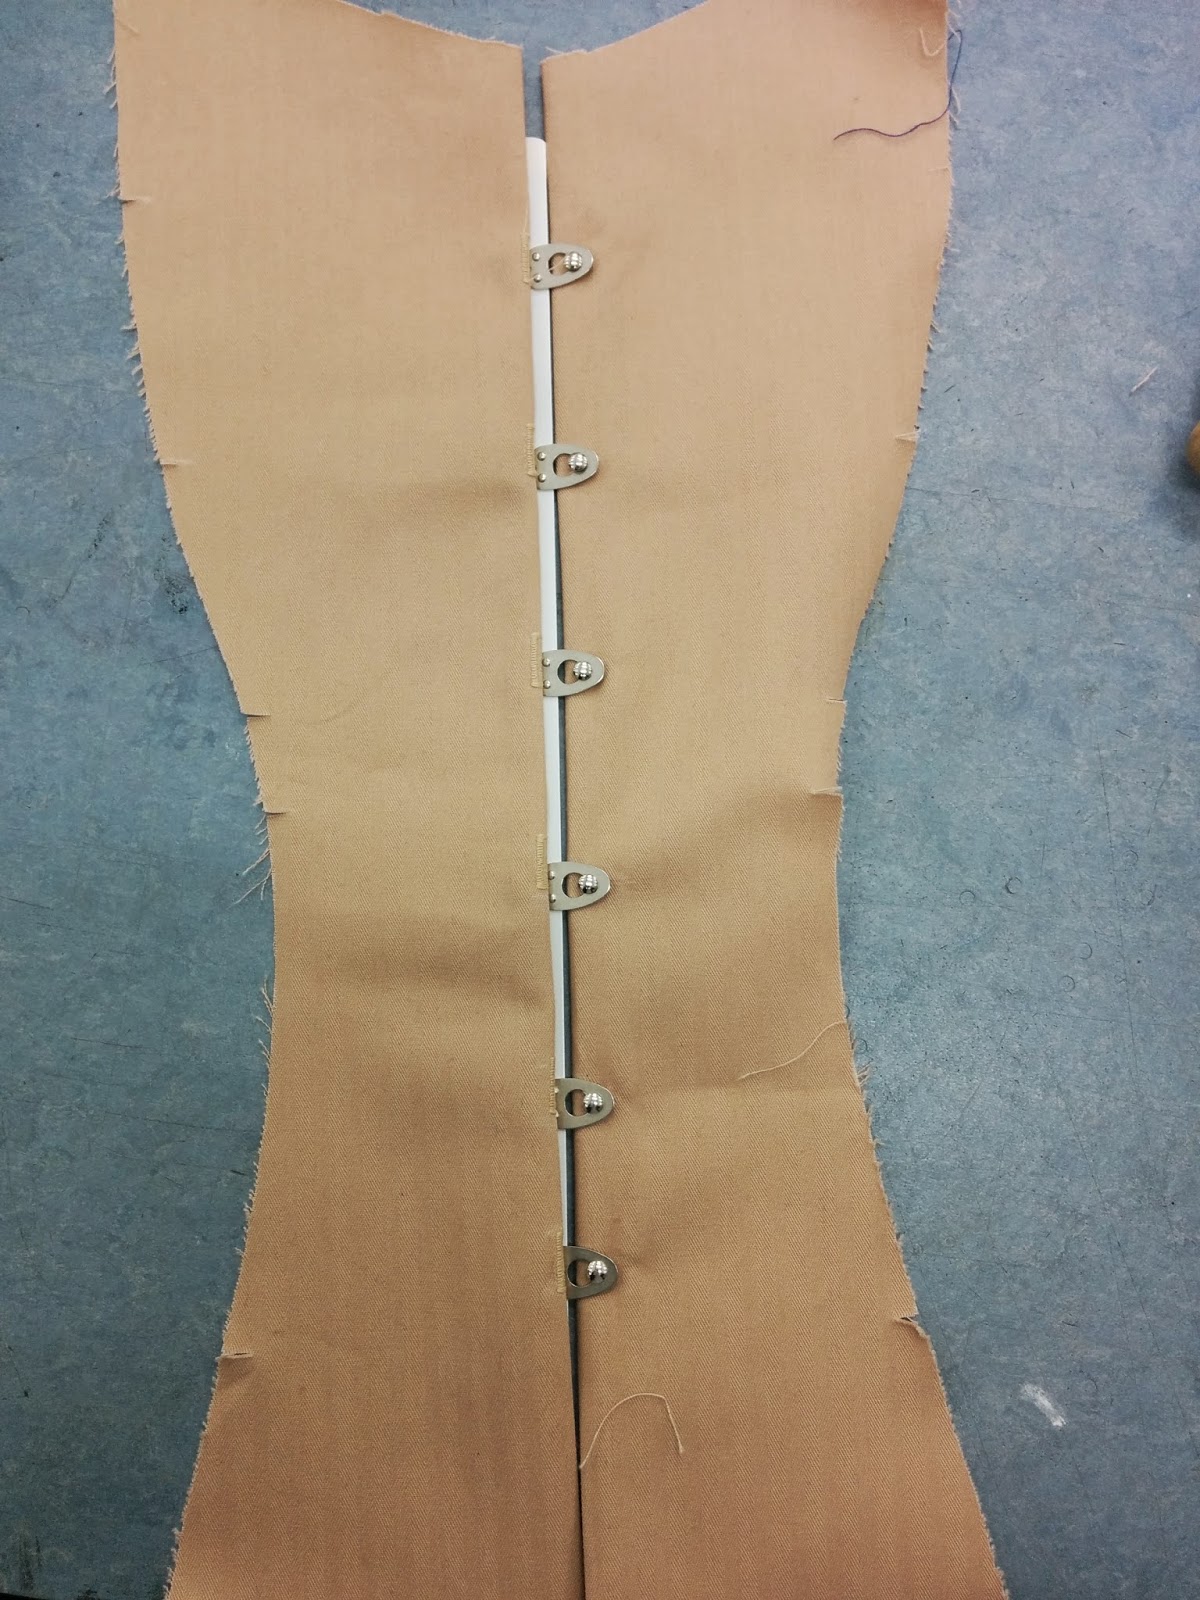
 The final two pictures shows the front (outside) and back (inside) of the very front of my corset.
I have made more progress since this, but will upload my pictures when I make more progress since I am almost done!
All I have left to do is maybe 2 seams, inserting the boning, eyelets, lacing it, hand stitching the side seams (this is so I can adjust the size for a perfect fit), and then using the taping along the top and bottom of my corset at the very end after deciding if there are any alterations I need to do. That sounds like a lot, but I will make a lot of progress in this week's class and will be finishing it after break for sure!
After I am done with my corset I will be working on creating samples for my sketch book and also doing embroidery samples, such as roses out of ribbon, on to my corset.
No comments:
Post a Comment